Friday 25 April 2014

No-knead pesto bread

What do I know about bread-making you may well ask?  Not much to be honest.  I can't remember ever making bread by hand with the endless proving and kneading.  And I don't remember anyone in my family ever doing it either.  I do remember the local bakery kindly handing out yesterday's loaves and buns to local families.  We lived in the countryside where there were lots of big and impecunious families, so a few free loaves went down well with the family cooks.
I have made so-called "breads" that are really cakes by another name, but this time I decided to give "real" bread a go even though once again it is a no-knead variety.  I saw the lovely and colourful Matt Preston make this on Masterchef last year and have been meaning to try it for yonks so this was the day!
You do have to start the night before as it needs to be refrigerated overnight for 12 hours but that is the only hard part really.  Check out his recipe- here!
I decided to tweak it a little (after reading Not Quite Nigella's recent blog post about making garlic and fetta bread which gave me the idea to add pesto).  So it is basically Matt's recipe with a wee twist.

Ingredients:

1 kg bread or baker's flour
1 tbs salt
1 tbs dried instant yeast
a few pieces of semi-dried tomatoes snipped into small shards
3 rounded dessertspoons of red pesto (from a jar- unless you feel like making some yourself)
950ml luke-warm water

Method:

Get a big bowl out and combine the dry ingredients together- i.e. the flour, salt and yeast and then add in the tomato shards
Place the pesto in a big Pyrex jug, and fill with the water till you reach the 950ml mark
Stir this well into the dry mix till you have a lovely moist, reddish mix- it will only take a minute or so
then cover the bowl with lots of clingfilm and whack it into the fridge till the next day

Next day take it out and leave to come to room temp- it will need at least an hour
Line a couple of baking sheets with baking paper and cast on a generous amount of flour
Divvy up the dough-I threw on some dried oregano, pepper, a tiny amount of olive oil and some Daintree vanilla salt on top before placing one half of the dough on one tray and baking at 220C for about 50-60 minutes.  Tap it on the bottom to check if done- it should sound hollow when ready.

You can then decide if you want to make another loaf or divvy it up into rolls etc.  I ended up by just making another roundish loaf and baking it separately.  As I have mentioned before, my old gas oven is very temperamental and I knew it wouldn't bake 2 loaves together in a successful manner!  If you have a good oven you could probably do 2 together.
I checked my loaf after 30 mins and decided it needed a bowl of water in the bottom of the oven to keep it a bit moist; I also threw a few drops of water on top of the loaf as it was getting very brown and hard.
After another 20 mins, it was ready to eat --which we did with lots of butter.  Mr Pickings has eaten rather alot!   Bread is one of his favourite things, just like everyone in his family.

dry ingredients and in the bowl

red pesto in the jug and dough ready to go in the fridge overnight

wow! look at how much it rose overnight

dough about to go in the oven and then coming out

it looks so amazing and smelled wonderful when baking


Monday 21 April 2014

Polish Easter cheesecake-Sernik

Easter is my fave holiday of the year, even though I was not brought up in a typical Christian religion, and did not partake as a child in any Christian festivities like Christmas, Easter or even birthdays.  Easter has none of the stress and expense of Christmas; just a gorgeous time of year with the summer heat finally dissipating, family, food and bucketloads of chocolate!  What could be nicer?  This year we headed up the coast to Mr Picking's sister to share Easter Sunday lunch with family.  Finally we are having some typical autumn weather- cloudless blue skies and brilliant sunny days with a tiny nip of chill in the morning air- a truly wonderful time of year.  Traffic was horrendous as it was the end of school hols,and everyone was obviously having a last fling at the beach.
Our Easter week started with an unexpected 1000 klm trip out west, and the blood-red moon of the lunar eclipse.  Talk about portentous!  We have finished it with a lovely, food and family filled lunch including a timely roast lamb, followed by numerous desserts and chocs.  Mr Pickings had given me a copy of "Sugared Orange" by Beata Zatorska for my last birthday (I love her books!).  And happily, there is a recipe for Polish cheesecake-Sernik- which is gluten-free, essential when cooking for Mr Picking's other (coeliac) sister (he has 4 of them- sisters I mean!).  This is a wonderful, light, crustless cheesecake-good for coeliacs and other hungry family members!

Ingredients:

5 large eggs, separated
500g ricotta cheese-(make sure it is gluten-free if this is a concern)
200g caster sugar - I always use vanilla sugar as I keep a tub of it with vanilla beans inside
140g butter- softened (not melted)
50g potato flour or arrowroot- I used arrowroot as I couldn't find any potato flour!
1 tsp orange essence
1 tsp vanilla essence
200g sultanas soaked in 4-5 tbs of rum for at least half an hour
50g mixed peel
50g dark chocolate chopped into small pieces
250g tub creme fraiche
dark cocoa for dusting
small Easter eggs or other small chocs for decoration

Method:

grab a whisk or wooden spoon, and beat the egg yolks and sugar together till well-combined
add the butter and keep whisking that in till you have a smooth, golden mixture
stir the ricotta into it
add the potato flour and the 2 essences
fold in the stiffly beaten egg-whites
add the sultanas and peel and the chocolate pieces

pour it into a lightly greased 23 cm springform tin which has been lined on the bottom with baking paper; you could use a 20cm tin and bake for around 50 minutes
bake at 180C for about 45 minutes- you don't want it overcooked
then take out of the oven and leave to cool in the tin on a rack
when completely cold, take off the cake-pan ring-I find it easier to leave the cake on the base
spread the creme fraiche over the top of the cake and leave in fridge overnight
the next day, dust with cocoa and place the choc eggs on at your whim!

look at those gorgeous cage free eggs!

adding ricotta then the flour and essences

stiffly beaten eggwhites added in and then peel and choc

in and out of the oven!

the final result- so pretty and delicious!


File:Lunar Eclipse.jpg
wow what a moon! (library image)


buy beata's book here-http://www.bookworld.com.au/book/sugared-orange-recipes-and-stories-from-a-winter-in-poland/31083084/

Tuesday 8 April 2014

Coconut curd

Delicious and moreish curd that you won't be able to resist!


Ingredients:

5 egg yolks
3/4 cup sugar
125g butter- cubed
315mls coconut cream

Method:

place yolks and sugar in a medium saucepan on a low heat
stir it all together (it will come together quickly)
then add in the cubed butter and whisk it together
stir in the coconut cream and whisk for about 6-8 minutes  
bottle it in clean, sterilised jars 

only 4 ingredients- brilliant!

on the stove ready to become curd

mixing in the butter

all stirred up and curdy!

luscious jars for the eating

yum!
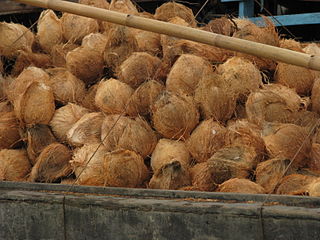
Coconuts bring back vivid childhood memories for me, unlike the average Victorian child perhaps!  My parents were very young and very poor, and they had 4 children under 6 at one stage.  For some strange reason, our grandmum thought it was a great idea to give her daughter a whole coconut every time she saw us.  Frankly, a lump of steak or a big bag of potatoes makes more sense, but who knows how an old lady thinks?  My dad would get out his hammer and chisel and hack away at the eyes of the coconut till he had pierced them, and the coconut water would flow out.  He would then break open the brown and hairy beast, break it up into small pieces and thus we would have something to chew on for the next few days.
These days I do not indulge in such antics, but I do drink coconut water and use the cream in curries.
Mysteriously, several cans of coconut cream have popped up in my pantry lately.  (I think I have a pantry elf who plays odd tricks on me)  I have been dying to try out the recipe from Not Quite Nigella's wonderful blog anyway so I had no excuse not to give it a go.  It is very easy to make and so delicious to eat.  I have been going back and forth to the fridge all day to have a wee spoonful- or 2!

coconuts galore!


Thursday 3 April 2014

Book review-Mexican Food Made Simple by Thomasina Miers and Frida's Fiestas by Guadalupe Rivera and Marie-Pierre Colle


The closest I have been to Mexico is the Tijuana border (pictured above).  Mr Pickings and I took the trolley from downtown San Diego to the border.  It was fascinating to see how the border guards checked all the cars -some from top to toe-for drugs, illegal immigrants and who knows what else!  And along those ridges you can see on the left (the US side) there were lots of patrol cars and men with big guns!  We didn't have a visa to get back into the US if we left it, so sadly we just had to poke our noses through the wire fence.
I have long been fascinated by the life and art of Frida Kahlo, the famous and tragic Mexican artist.  I first became aware of her work many years ago.  Since then, I have read books about her, seen a couple of movie bios, and lusted after her paintings. Lucky Madonna for being able to afford a Frida collection!
Mr Pickings bought me a copy of Frida's Fiestas some years ago, a collection of recipes gathered together by her step-daughter Guadalupe Rivera to showcase the foods that Frida would cook in her kitchen.  (on my bucket-list- visiting The Blue House in Coyoacan where she lived and worked).
the courtyard of The Blue House 
 When I first owned this book, it was very difficult to obtain Mexican ingredients so I felt that her recipes were out of my reach.  I just enjoyed looking at the amazing photos and drooling over the exotic foods.
Fast forward-mmm-a number of years later and we have Mexican taquerias popping up like mushrooms, and everybody seems to have their own quesadilla and taco speciality.  So we come to my new Mexican fave-  Mexican Food Made Simple by Thomasina Miers.  I have been a fan of hers since she made those TV shows Wild Gourmets, and A Cook's Tour of Spain.   She has recently opened a chain of Mexican restaurants in London called Wahaca (I guess she figured no-one would be able to pronounce it if spelt as it should be- Oaxaca). Her recipes seem to be much more than Tex-Mex which is great, and these days the ingredients are much easier to source.
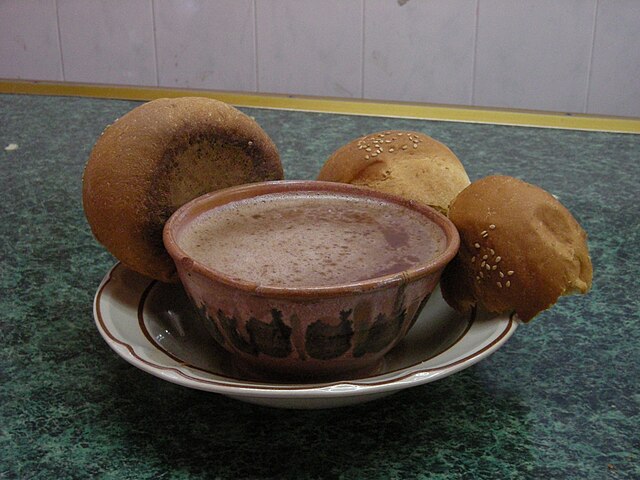
Frida's recipe for hot chocolate uses milk, Mexican chocolate and sugar.  The milk and chocolate are heated together, sugar is added in and the mixture is beaten with a whisk till foamy.  That's it!  Sounds delicious!
Tommi's recipe is similarly easy with chocolate, milk or water and a cinnamon stick heated, then whisked till frothy.


I love black bean soup and both cooks have a recipe for it which has tomatoes, black beans, herbs and garlic cooked and pureed into a soup, and served with tortilla squares and cheese.  I actually like Tommi's recipe more as it has more herbs, onion and lime juice to liven it up.


Mole Poblano is of course the Mexican main that we all know of.  It is a complex recipe with lots of ingredients and steps, and is worth the extra bit of work to make it.  (Frida has recipes for Red and Yellow Mole too).  Mole Poblano is full of spices and flavours; it has 3 types of chillies, cinnamon, garlic, cloves, onions, peppercorns, pumpkin seeds, nuts, raisins, Mexican chocolate and so on.  (I have made a simplified version of this recipe that a friend gave me, with all the flavours but less work.)  Australians tend to love robust flavours; Thai and Vietnamese foods being very popular.  I think the complex tastes of Mexican food follow our quest for flavoursome food with a kick.

that is a lot of mole sauce!
Tommi's book covers starters, mains, desserts and drinks so all the bases are covered, and you get a great insight into the sorts of flavours that Mexican food will provide you.  Her recipes use (fairly) easily-obtained ingredients, and the methods are not beyond the average cook.  I am looking forward to getting stuck into a Mexican fiesta!


You can buy Frida's Fiestas from Amazon-here;  and Tommi's book-here.
(please note -apart from the photos of the books, all photos are from Wikimedia).